
You’ve decided to radically change your lifestyle and make the leap to living in an RV full time.
One of the most important steps in the transition from living in a house or apartment to an RV is downsizing your paper footprint. This process involves eliminating paper mail and digitizing the important paperwork you currently have. The majority of paperwork collected and stored over the years does not need to be kept long term and should be recycled or shredded.
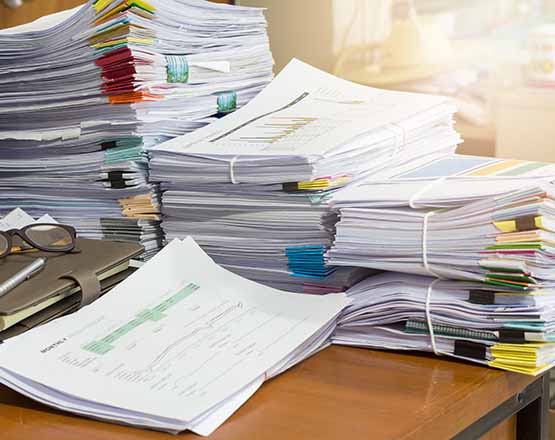
Converting a full-sized, heavy filing cabinet full of paperwork to a digital solution that can be kept on the cloud, a USB stick, or small external hard drive may seem intimidating. The process is relatively easy when you have the right tools and take the proper steps to prepare.
Important original documents like a will or birth certificate can be scanned and stored digitally but should be kept in a fireproof safe or bank safety deposit box once the scanning process is completed.
There are 6 steps to go paperless as you transition to full time RV living:
1. Change Online Account Communication Preferences to Electronic
2. Sort Your Documents and Decide What to Keep
3. Digitize and Upload the Documents You Are Keeping
4. Backup Your Online Digital Documents to a USB or SSD Drive
5. Store Your Original Documents
6. Shred All Remaining Documents
1. Change Online Account Communication Preferences to Electronic
Most online accounts for banking, insurance, cell phone, utilities, etc., have the option of changing communication preferences from paper mail to electronic communication via email or an online portal. Changing your communication preferences to electronic allows you to eliminate mailed paper documents that you would otherwise need to digitize or shred.
Leading up to your transition to full time RVing, keep a sheet of paper or notebook next to where you store and process your mail. For a couple of months, anytime you get a piece of mail that isn’t junk mail, write down the company or organization so you can track which companies you need to change your communication preference with so you stop receiving paper mail. If you don’t already have an online account with an organization, you should be able to create one.
Periodically, you can reference the list you created to transition your accounts to electronic communication. This is a step you don’t have to complete all at once. You can make the transition as the paper mail comes in one at a time.
Making the change to electronic communication is a straightforward process.
- Login to your account
- Find the communication preference settings page
- Change the preference from paper to electronic
- Confirm the change by saving your profile or through email confirmation link
If you’re unable to find the communication preferences page, you can run a Google search with the following phrases:
- [Business Name] communication preferences
- [Business Name] account settings
The top results for those search terms should get you pointed in the right direction. If that fails, you could always call the company or institution and ask them to update your communication preferences over the phone.
If you plan on calling the company, make sure you’re using the correct contact phone number from the official website. Unfortunately, there are crooks and scammers out there that setup phishing websites that look just like the real thing.
By changing to electronic communication, you’ll be able to access the document from wherever you are, whenever you need to rather than waiting for the bill or statement to reach you through a paper mail forwarding service.
2. Sort Your Documents and Decide What to Keep
The next step after changing your communication preferences is to determine what paper documents you need to keep, and what you will recycle or trash. The documents you keep will be digitized in the next step.
There’s no need to carry around old, heavy paper documents that are no longer useful. Weight and space are precious commodities on an RV and the less paperwork you have to tote around, the better.
If you’re anything like me, you tend to hold onto paperwork that is no longer relevant. Eliminate the clutter and streamline your papers by recycling or throwing away unneeded documents.
Lay everything out and sort it into “Keep” or “Toss” piles. Make sure to fully settle on what you will keep before starting the disposal process. I’ve included a list of documents below you should definitely plan on keeping.
Documents to Keep
Legal identification documents
- Passport
- Social Security card
- Marriage license
- Birth certificate
- Adoption papers
Medical records
- Wills, powers of attorney, or living will
- Medical bills
- Funeral and burial instructions
- Health insurance policies
Tax documents
- Federal and State Tax returns
- Tax related forms such as W-2s and 1099 forms
- Receipts and records used to prepare taxes
Property and vehicle records
- Mortgage statements, deeds, bills of sale, inspection reports, etc.
- Vehicle titles and registration
- Insurance policies (home, auto, personal property, etc.)
Pet records
- Medical records
- Vaccination records
- Prescriptions
Financial records
- Pay stubs
- Canceled checks
- Disability or unemployment records
- Retirement/pension plan records
- Investment statements
- Bank statements
- Crypto currency wallets/keys
Other
- Utility statements
- Warranty documents
3. Digitize and Upload the Documents You Are Keeping
Now that you have determined which documents you are keeping, you are ready to begin creating digital PDF copies of them by scanning them. Scanning of your documents may be done using a flatbed scanner, your smartphone or a tablet. Any of these scanning options are good, but you will want to decide which option works best for you.
Scanning Option 1: Scanner
If you have a fast scanner that can handle several documents at a time through a paper feeder, that is likely the best option. I recommend purchasing a dedicated scanner if you have several dozen or even hundreds of documents to digitize. This initial small investment will save you a lot of time and give you high quality scans of your important documents. Dedicated scanners like the two examples below are very inexpensive and produce high quality scans. It’s possible you may already have a scanner that will do the job. Most modern inkjet printers include a scanner that can produce the quality scans you need.
My Scanner Recommendations
Canon CanoScan Lide 300 Scanner
- Scan documents quickly and easily with fast scanning up to 10 seconds
- Digitize documents and images thanks to 2400 x 2400 dpi resolution, and with image enhancements, such as fade correction and dust reduction, your photos will continue to look great
- Enjoy ease of use with 4 ‘EZ’ buttons. With auto scan mode, the Scanner automatically detects what you’re scanning; Built in PDF button, easily scans and saves pdfs that are editable and searchable
Epson WorkForce ES-50 Portable Sheet-Fed Document Scanner
- Fastest and lightest mobile single sheet fed document scanner in its class(1) small, portable scanner ideal for easy, on the go scanning
- Fast scans a single page in as fast as 5.5 seconds
- Versatile paper handling scans documents upto 8.5 x 72 inches, as well as ID cards and receipts
- Smart tools to easily scan and organize documents Epson ScanSmart Software(3) makes it easy to scan, review and save
- USB powered connect to your computer; no batteries or external power supply required
Canon ImageFORMULA R40 Office Document Scanner
- Reliably handles many different document types: Receipts, photos, business cards, reports, contracts, long documents, thick or thin documents, and more
- Fast and efficient: Scans both sides of a document at the same time, in color, at up to 40 pages per minute, with a 60 sheet automatic feeder, and one touch operation
- Broad compatibility: Windows and Mac TWAIN driver included
- Easy Setup: Simply connect to your computer using the supplied USB cable
- Bundled software: Includes easy-to-use Canon CaptureOnTouch scanning software (Win and Mac) plus free licenses for Readiris PDF and OCR software and Cardiris business card software (Win)
Scanning Option 2: Smartphone or Tablet
A great alternative to a dedicated document scanner is your smartphone or tablet. There are dozens of free and premium scanner applications available in the Apple App Store or Google Play Store that are able to produce PDF documents using the camera on your device.
I have tried many scanning apps and have found that most of them are clunky, buggy and have limited features. The only scanner application I can recommend is Adobe Scan. It is intuitive, easy to use, provides quality scans, handles multi-page documents well, and integrates seamlessly with a variety of document storage locations. I have deleted all other scanning apps from my smartphone and I don’t miss them.
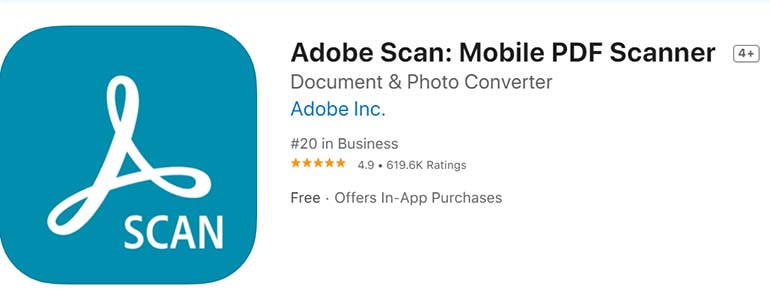
Get Adobe Scan on Android Google Play or Apple App Store.
View more information about the Adobe Scan app on Adobe’s website.
Set a storage location for the digital PDF scans
Before you begin scanning, you’ll need to choose a cloud storage solution where the PDF scans will be stored as they are created. It should be affordable, easy to use, and secure enough to protect your sensitive information in digital form.
The parity between different cloud storage options has quickly closed over the past several years. Ultimately, it comes down to your personal preference and what devices and software you are currently using (Apple, Google, Microsoft, etc.). You’ll want to select a cloud storage service that integrates well with your current ecosystem (iOS, Windows, etc). If you use an iPhone and a PC, you’ll want a cloud service that interacts equally well with both the iOS and Windows systems.
There are many great cloud storage options to choose from. Here are some of the most popular:
Here is some additional information to be aware of as you make your decision:
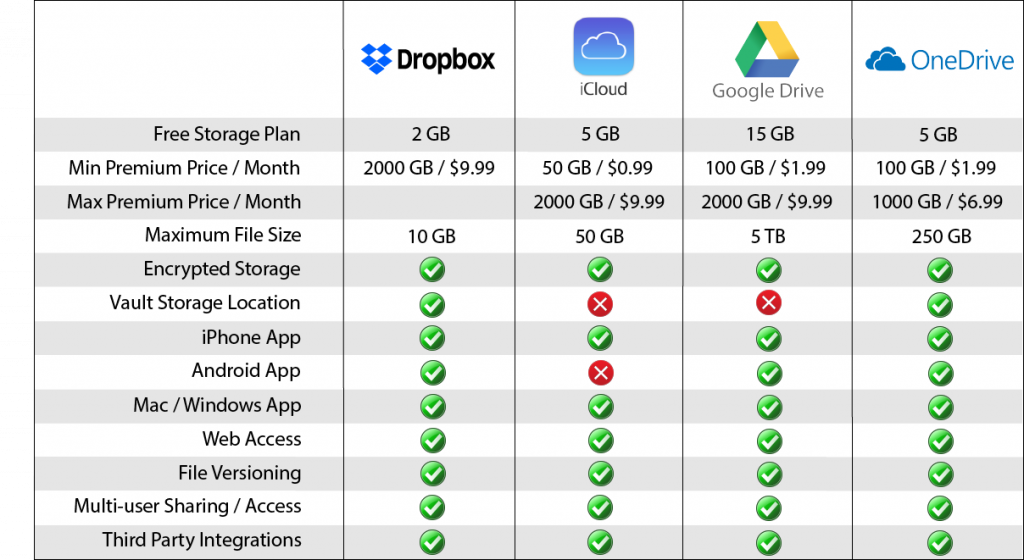
| Storage Service | Features and benefits |
 | If you are already an Apple user (iPhone, iPad, Mac, etc.) with an Apple ID, you will have the free version of iCloud storage as part of your Apple account. |
 | If you’re looking for a double layer of security, Dropbox offers a feature called the Vault. It requires a PIN code to open in addition to your regular password. |
 | If you have a Google or Gmail account, you will have the free version of Google Drive as part of your account. A benefit of using Google Drive is that it is already integrated with and has access to Google Docs, Sheets, etc. |
| Basic Microsoft Office apps are also included in the $6.99 plan. If you have a Microsoft account, your account includes the free version of OneDrive storage (5 GB). Similar to Dropbox, Microsoft also has a Vault within OneDrive that requires an additional PIN to access. |
Paid vs Free Cloud Storage
For the majority of full time RVers, the free version of the cloud storage solutions above is sufficient for storing the documents you’re digitizing. In the event you need additional storage space, you can always upgrade to a higher tier. The higher tier plans can be purchased at reduced rates when you pay for an annual membership.
I have used all four of these storage options over many years and have decided that Dropbox is the best all around solution for me. I like how it integrates well with my Apple devices, how simple the app is to use, and the Vault feature provides a high level of security for my most confidential documents.
Not Limited to Just One
One thing to mention is you are not restricted to just one of these cloud storage options. I use a combination of Dropbox, iCloud, and Google Drive.
Dropbox – holds my scanned documents and other sensitive files that I secure using the Vault.
iCloud – I use an iPhone as my primary smartphone so iCloud stores my photos and contacts.
Google Drive – I use the Google productivity suite to work on documents and spreadsheets.
The ultimate goal is to find a secure digital document storage solution that is right for you. It needs to be affordable, easy to use, and secure enough to protect your sensitive information in digital form.
Prepare your documents for scanning
You’ve decided on your scanning method and cloud storage solution. It’s time to prepare your documents for scanning. The goal at this stage is to organize your paperwork to speed up the scanning workflow. The more organized you are, the easier it will be to name and scan files when scanning.
Group your documents into categories that are arranged by specific companies and/or topics. For example, you would group all documents related to dental care, eye care, etc., in a category called “Medical”. Within each category, sort by the name of the document. This will help later when you name the digital files during the scanning process. If you aren’t already using folders (manila or hanging) for each category, set up a folder system in order of category and place your documents in their respective folders. If you have enough floor or desk space, carefully separated piles will suffice.
Write descriptive notes on your documents as needed. If a document doesn’t already have a descriptive heading, take a pen and annotate on the paper with clear info so you don’t have to decipher later what the document is for. This is very helpful with receipts for items from a store (you might not remember the store code for the item in 9 months). Circle or highlight important dates or dollar amounts for easy reference in the future.
Establish file naming convention guidelines. Before you start scanning and creating PDF files, establish a file naming convention that makes it easy to identify and search your files later. For example, your filename could include the category you established earlier, the name of the original document, a brief description of the document, and the date of the document (if important). The more descriptive you are in the file name, the easier it is to search or identify when you need to locate a specific document.
The length of a file path including your file name used to be an issue. However, current operating systems support much longer file paths: 260 in Windows 10 and 255 characters in iOS. Unless you plan on writing a novel, you should be able to be as descriptive as you’d like when naming your files.
Example file name convention:
Category – Document Name – Description – Date
Medical – Northview Dental Bill – Crown work on Jeff – 2009-02-20
Utilities – Verizon Cell Phone Statement – February 2008 Bill – 2008-03-05
Set your scanner settings
Use the following scanning settings regardless of the scanning method:
| File Type | PDF – the PDF format is the easiest to open and read on a variety of devices |
| Resolution | 300 to 600 dpi – anything higher creates file sizes that are excessively large and can slow down upload/download speeds; anything lower might not be clear enough to read smaller text on a page |
| Color vs. Black and White | Black and white – unless it is absolutely necessary to scan a document in color, it is best to scan in black and white so that your PDF file sizes remain smaller. It is much easier to upload and download smaller file sizes. |
| Default file location | Select the cloud storage location you have decided to use (Dropbox, Apple iCloud, Google Docs, Microsoft OneDrive, etc.) |
If using a smartphone or tablet, set up proper lighting and a good background. Find a location in your office or home that can provide adequate lighting with no shadows. Choose a contrasting background (black or dark) to contrast with light color paper.
Start scanning your documents
After confirming your scanning settings, start scanning your documents. Scan one document at a time, monitoring the results to ensure the scans are working properly. Your scanning workflow will speed up fairly quickly once you get the hang of it.
As you scan, tag each document (with a checkmark or post-it note) whenever you finish scanning it. This will help you keep track of the documents that have been digitized.
If a document has multiple pages, you can create a multi-page PDF file. Depending on the scanning method you chose in the previous steps, this may require a couple of extra steps.
Learn more about multi-page scanning
If your document is an odd size smaller than 8 ½ x 11, your smartphone/tablet app or scanner will sometimes not scan the entire document correctly. If that happens, place your document on top of a blank 8 ½ x 11 sheet of paper and rescan. This is especially helpful when scanning small receipts.
4. Backup Your Online Digital Documents to a USB or SSD Drive
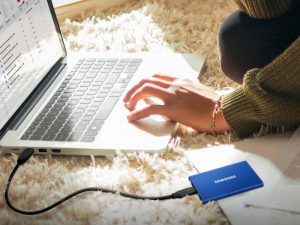
After scanning and uploading your documents to the cloud, create a backup on a USB stick or external harddrive. This backup should be maintained periodically as you scan and upload new documents (when on the road). This backup gives you access to documents when you don’t have access to the internet or your internet connection is slow or spotty.
Having multiple backups is generally a good idea. Your local USB or harddrive copy(s) should live in the fireproof safe which will be discussed in step 5.
One of the best document storage options is a USB drive. Make sure it has plenty of storage capacity for all of your files. I recommend your USB drive has at least 32 GB of space so that you do not have to worry about running out of space when you start creating your digital files.
Another great storage option is an external SSD hard drive. An external harddrive is similar to a USB drive in function but typically has significantly more storage capacity. Most SSD hard drives will have a storage capacity of 256GB or more at a reasonable price.
I would recommend purchasing a new USB or SSD drive for your file backups instead of repurposing a drive you already have.
My Drive Recommendations
- Redefine everyday file transfers with speeds up to 400MB/s
- Reliable and secure storage for your photos, videos, music, and files
- Rugged metal casing for durability with key ring to prevent loss.Operating Temperature:0~60℃
- Safeguard your data (Water proof, shock proof, magnet proof, temperature proof, x ray proof)
- USB 3.1 flash drive with backwards compatibility (USB 3.0, USB 2.0)
SanDisk 500GB Extreme PRO Portable External SSD
- Save time moving and editing your files with lightning-fast, in-house NVMe technology that dramatically increases transfer speeds to up to 1050MB/s.**
- Ruggedized design with a forged aluminum body protects the SSD core and dissipates heat.
- With capacity of up to 500GB, creative professionals have enough space for full libraries of content
- Compact, pocket-sized design won’t weigh you down when you travel.
- Universal compatibility with PCs and Mac computers with USB Type–C and Type-A connections
I only buy Samsung portable drives, and highly recommend this specific model. In addition to Samsung’s quality and reliability record, I really like the password feature. That extra level of security means I don’t have to worry that someone will read my files if they steal my drive.
- TRANSFER IN A FLASH: Transfers files nearly 9.5x faster than external hard disk drive (HDD). Reads up to 1,050 MB/s / Writes up to 1,000 MB/s on USB 3.2 gen 2 supported devices
- BUILT STRONG & SECURE: Shock-resistant and withstands drops from 6ft.
- ADVANCED HEAT CONTROL: DYNAMIC THERMAL GUARD (DTG) TECHNOLOGY protects the T7(T7 Touch) from overheating by automatically slowing down data transfer if necessary.
- PASSWORD SECURITY
5. Store Your Original Documents
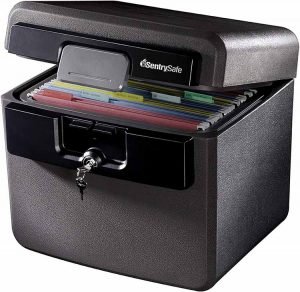
After you have created and stored digital copies of your documents, store the originals of your documents in a small fireproof safe placed in a secure and hidden area of your RV. For extra security and peace of mind, consider storing your legal documents in a bank safety deposit box.
Store in a fireproof safe
Storing your originals in a fireproof safe will ensure your sensitive information is never accessed by a stranger and your important documents are never lost in a fire. Use a safe that is large enough to accommodate all of your documents and any other small items you wish to secure. I recommend you store your USB drive or SSD drive in the safe. Look for a place to hide your safe so that it will not be taken in the rare chance a thief ever enters your RV.
My Safe Recommendation
SentrySafe HD4100 Fireproof Safe and Waterproof Safe with Key Lock
- Fireproof box is UL Classified to endure 1/2 hour at 1550°F to protect irreplaceable documents, small valuables, DVDs, and USBs from fire
- Waterproof box is ETL Verified for 72 hours of water submersion offering peace of mind in the event of a flood
- Fire safe features a flat key lock to prevent the lid from opening in the event of a fire; Includes 2 keys. Material – Captured Fire Insulation
- Document safe features built-in straps for easy storage of passports, social security cards, and birth certificates; Fire box accommodates letter-size hanging files and folders (sold separately)
DO NOT use a fireproof envelope. They are anything but fireproof.
Store most important documents in a bank safety deposit box
For absolute security, you may want to consider storing your most important documents (marriage license, birth certificate, will, etc.) in a bank safety deposit box. Choose a bank location you are able to visit a few times as you travel throughout the year.
6. Shred All Remaining Documents
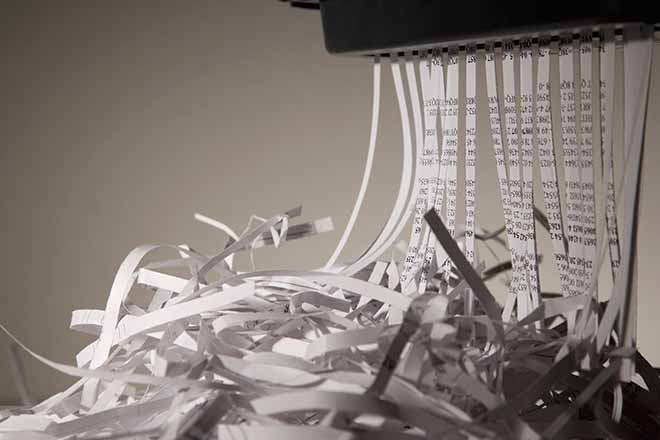
You’ve digitized your important paper documents and decided where you’ll keep the originals. It’s time to shred the remaining paper documents that you are not keeping.
You can shred your documents at locations like Kinkos, Office Depot, UPS and Staples. Most places shred up to 5 pounds of paper for free and charge $1 per pound after. If you don’t want to travel to shred your documents, you can purchase a shredder and dispose of the documents from the comfort of your own home.
Here’s a cost effective shredder I’d recommend. As with most office appliances, you get what you pay for. A dirty cheap shredder is likely to overheat if you are running a lot of paper through it. It’s best to run small batches of 1-3 pieces of paper through the shredder and give it breaks to cool down. You don’t want to burn out the motor.
Amazon Basics 8-Sheet Capacity, Cross-Cut Paper and Credit Card Shredder, 4.1 Gallon
Related Questions:
How Do I Create a Multi-page PDF Document While Scanning?
Creating a multi-page PDF document while using the Adobe Scan App can be done very easily. After scanning the first page, continue to scan all of the remaining pages one by one. Until you exit the scanning process, Adobe Scan will always assume you are adding additional pages and will display a running total of the number of scanned pages as you go. Once you have finished scanning the last page of the document, exit the scanning process. Adobe Scan will then display all of the document pages in the order you scanned them. You will then be able to review the pages, name the document, and save the PDF.
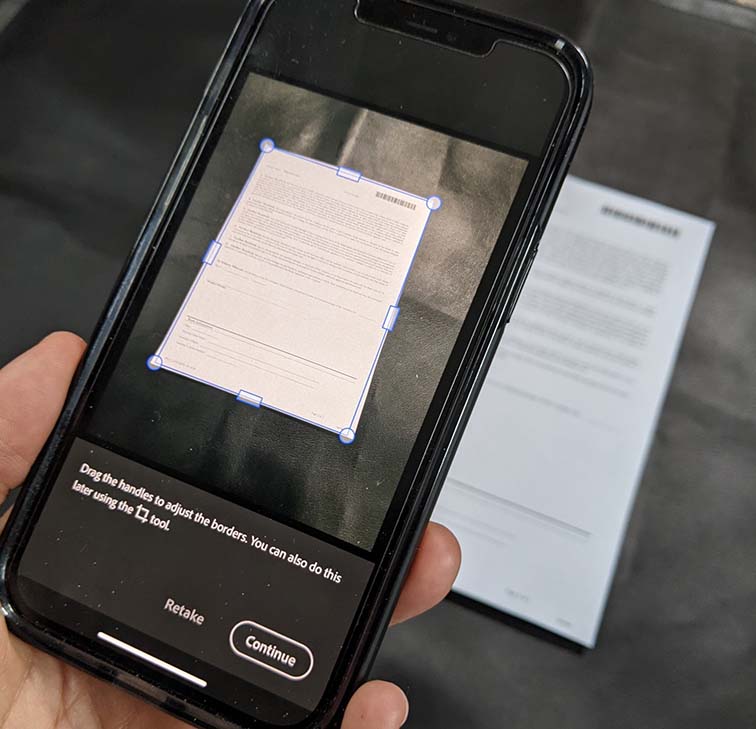
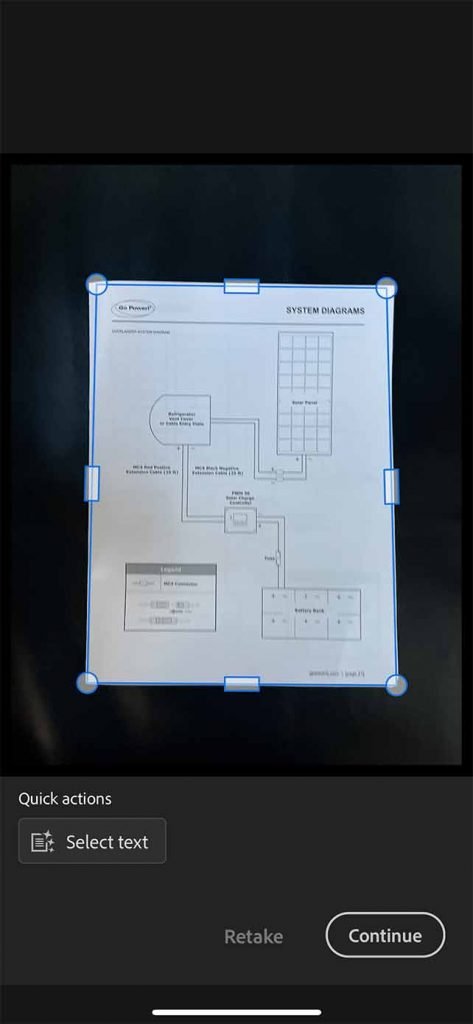
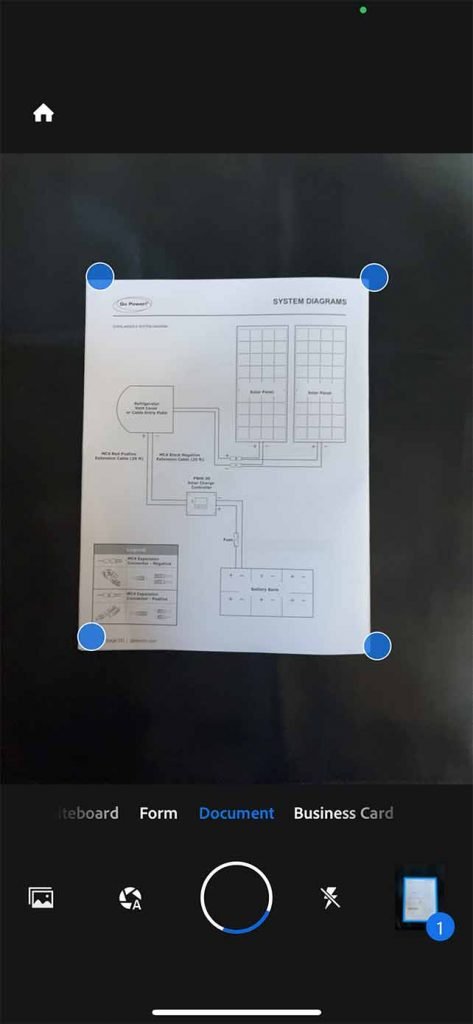
For example, let’s say I have a three page document I want to scan with Adobe Scan. I begin by scanning the first page.
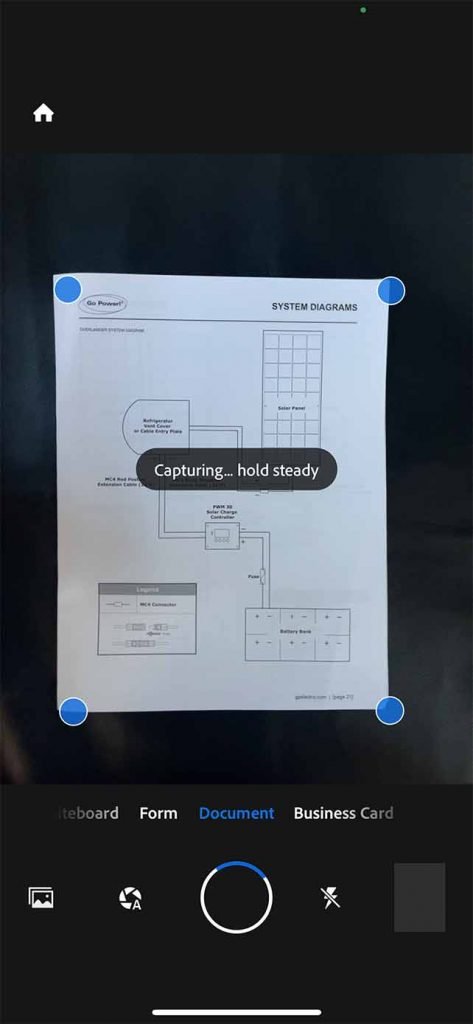
Once Adobe Scan is finished capturing the first page, I have the option to Retake the scan (if I am not satisfied with the image) or Continue (if I like the image and am ready to move on to the next page).
When I press Continue, Adobe Scan saves the scan of the first page and indicates on the lower right of the screen that one page has been scanned. At the same time, Adobe Scan prepares to capture the next page once I have it in place.
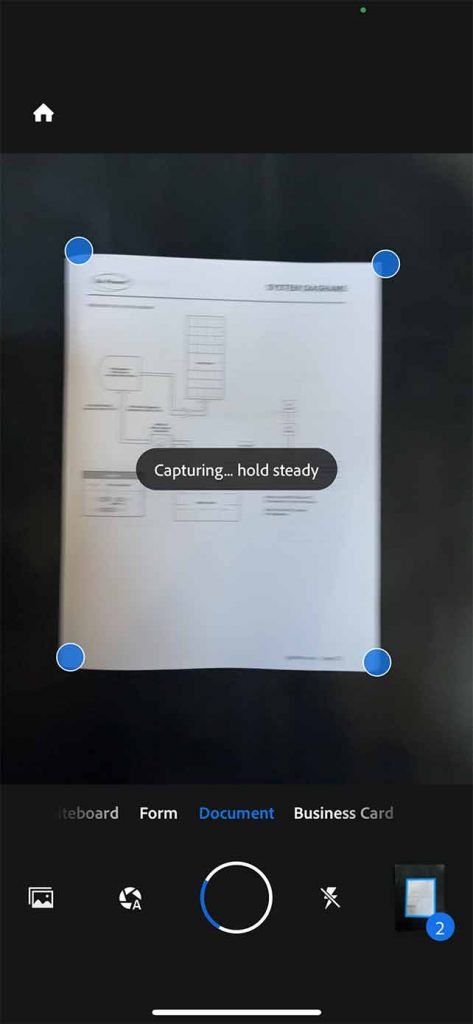
Once the second page has been captured, Adobe Scan saves the scan of that page and indicates on the lower right of the screen that two pages have now been scanned. At the same time, Adobe Scan prepares to capture the third page once I have it in place.
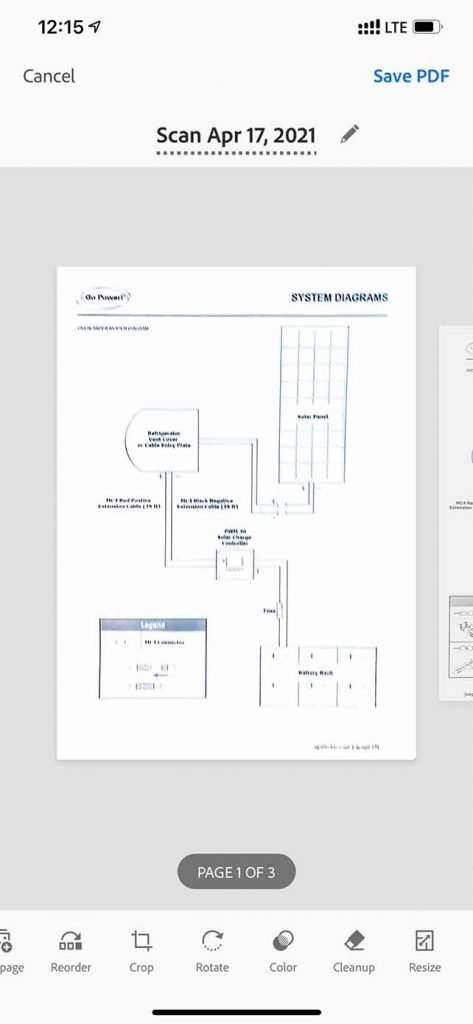
Once the third page has been captured, I press the page icon in the lower right to indicate that I am done scanning the document. Adobe Scan will then display all of the document pages in the order I scanned them. I am able to review the pages, name the document, and save the PDF.
How Do I Combine Existing Single PDF Documents into a Multi-page PDF document?
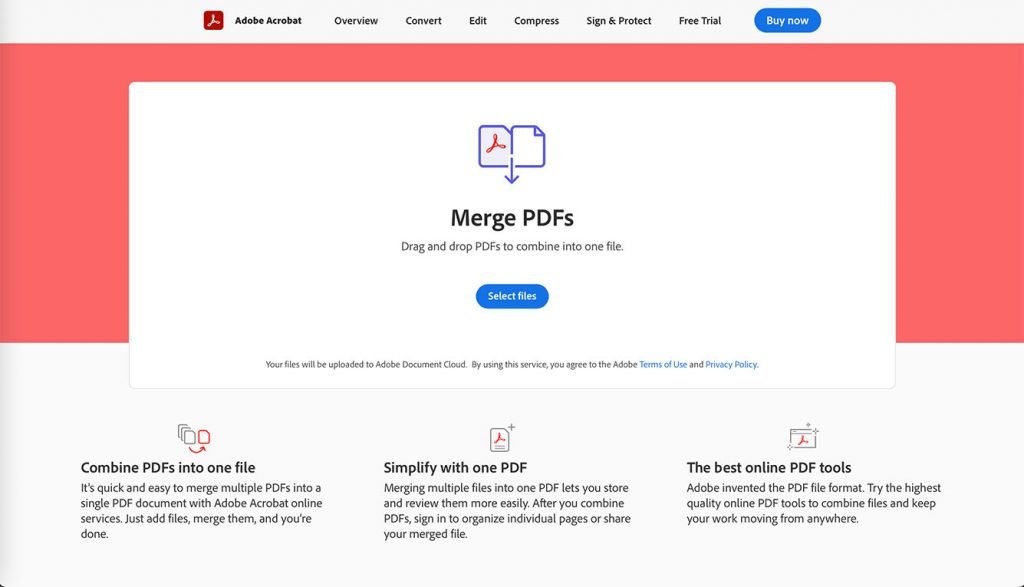
The easiest way to combine single PDF documents into multi-page PDF documents is using Adobe’s online merge tool. You can access the tool at https://www.adobe.com/acrobat/online/merge-pdf.html.
Alternatively, you can merge single PDFs into a multi-page PDF using one of the many online combining tools like https://smallpdf.com/merge-pdf.
What Is The Best PDF Scanning App?
Adobe Scan is the best PDF scanning app I have used to date. After trying and deleting 5 of Adobe’s top competitors, I can confidently say that Adobe Scan is the best document scanning app on the market.
Get Adobe Scan on Android Google Play or Apple App Store.
View more information about the Adobe Scan app on Adobe’s website.
Can I Use a Fireproof Envelope Instead of a Fireproof Safe?
Do not let the name fool you. Fireproof envelopes are anything but fireproof. I cannot stress this enough: you need a fireproof safe to protect the documents you are keeping in your RV. I’ve included a couple of fireproof envelope testing videos below. Documents placed in a fireproof envelope rather than a fireproof safe are quickly turned to ash.
How Should I Manage the Passwords of My Online Accounts?
For most of us, the number of our online accounts has grown rapidly over recent years and it is becoming increasingly difficult to keep track of the login information for each account. Many people try to solve this problem by storing their usernames and passwords on post-it notes or other pieces of paper that can too easily be compromised or lost. Or some people elect to use a username and password that are very easy to remember and then reuse that username and password for all their accounts. This is dangerous because a data breach of just one of the accounts can allow a hacker to then access all of the other accounts using the same username and password.
How do we then manage the growing amount of login information we all need to keep track of? For maximum online security I recommend using a password manager. A password manager allows you to store all of your login information in one secure and encrypted location online that can then be accessed whenever you need to login to an account. Many options exist that are very secure, inexpensive, easy to use, and work across all computing platforms (desktop, laptop, smartphone, tablet, etc.). In my opinion, the three best Password Manager solutions are: Dashlane, 1Password and LastPass. Any one of these three is an excellent choice.
Dashlane offers a free plan which is limited to a single device and 50 accounts. With their $4.99 per month Premium Plan you are able to sync your Dashlane manager across multiple devices and have unlimited accounts. Also included are helpful features such as dark web monitoring and VPN for wifi protection.
1Password‘s lowest plan for individuals is $2.99 per month for unlimited devices and unlimited accounts. 1Password provides many excellent features that are worth considering.
LastPass offers a free plan that can manage unlimited accounts but is limited to one device. Their $3.00 per month plan allows you to sync across multiple accounts. Just like Dashlane and 1Password, LastPass offers additional features that are very useful.